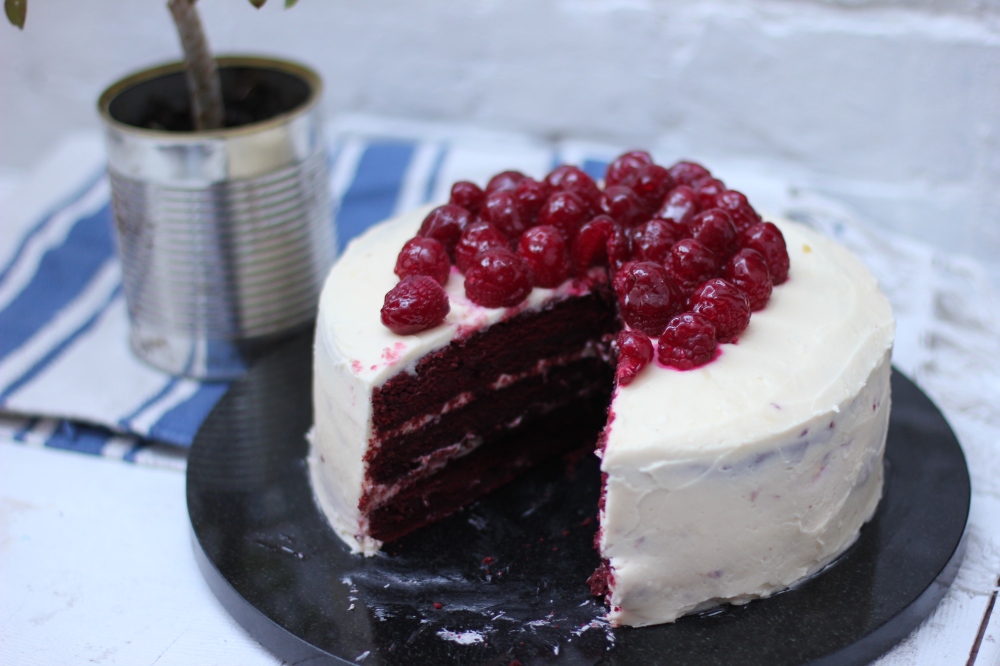
Made this rich, decadent beauty from ‘Cool Layer Cakes’ by Ceri Olofson and adapted the recipe a little, as V and I aren’t fans of marzipan. Turned out beautiful and moist, and is lasting us all week 🙂 Serves 20+ (slice the cake thinly, as it is extremely rich and portions do not need to be big to fill you up).
Ingredients:
Cake batter
- 450g caster sugar
- 180 unsalted butter, softened
- 3 large eggs (4 medium eggs)
- 360ml buttermilk
- 3 tsp vanilla extract
- red food gel
- 60g cocoa powder
- 450g plain flour
- 1 1/2 baking soda
- 4 1/2 tsp white vinegar
Icing & filling
- 250g unsalted butter, softened
- 400g icing sugar, sifted (original recipe called for 500g, but I found this icing almost overly-sweet)
- 250g full-fat cream cheese (with the excess liquid drained off)
- 2 cans of tinned raspberries
Decoration
- 100g seedless raspberry jam (or 2-3 heaped tbsp)
- 2 punnets raspberries
Method:
- Pre-heat oven to 160C fan.
- Beat sugar and butter until light and fluffy.
- Gradually add the eggs.
- In a separate bowl, mix together the buttermilk, vanilla and red food colouring until all combined and a bright, intense colour. (You can add more colouring later if the batter doesn’t look bright enough once incorporated.)
- Sieve together the cocoa powder and flour in another bowl.
- Add half of the red buttermilk mixture to the batter, and combine. Next, add half of the dry ingredients, then repeat, alternating mixtures, until everything is incorporated.
- Add the baking soda and vinegar. Now is the time to add more food colouring if desired (I found I had to add a lot more than I thought, even with the gel; I used about 1/3-1/2 of the pot, but remember that this is a large cake). I did this by dissolving the gel in a dribble of boiling water until liquid-y (this incorporates more evenly into the cake) then added it to the batter until I got the colour I wanted.
- Divide the mixture into 3 identical tins, and bake for 30-35 minutes/until a skewer comes out clean. Allow the cake to completely cool before decorating.
- To make the icing, beat the butter on its own until pale and fluffy.
- Add the icing sugar in manageable batches (so icing sugar does not explode everywhere), incorporating completely before adding the next batch.
- Add the cream cheese, and beat until smooth, fully incorporated, and lump-free. Chill until needed, and take out 20 minutes prior to use.
- To assemble the cake, level any uneven layers if needed, then build it up: one layer of cake, one layer of icing, then one can of drained tinned raspberries, all evenly spread. Repeat, then top with the final cake layer. Crumb-coat the entire thing, and chill until firm.
- Use the remaining icing in a final layer over the entire cake, then arrange the fresh raspberries on top.
- Heat the seedless raspberry jam on the hob until just melted (you can add a drop of boiling water along the way to help it loosen up if too jelly-like), and once cooled, but still runny, brush over the top of the raspberries for a final glaze.

WOW! This is gorgeous!
LikeLiked by 1 person
Thank you so much 🙂
LikeLiked by 1 person
Oh my ! what an amazing cake ! So tempting!
LikeLiked by 1 person
Thank you! It was soo delicious 😛 especially with the addition of the raspberries… so good 🙂
LikeLike
This looks amazing!! Red velvet has to be my favorite flavor of cake!
LikeLiked by 1 person
Thank you! Oh my goodness same – nothing beats a good red velvet, and the raspberries just add a whole other level to the cake 🙂
LikeLike
I love your pictures ❤ 😉
LikeLiked by 1 person
thanks charis 😉
LikeLiked by 1 person